Introduction
This tutorial shows how to program the LEGO MINDSTORMS EV3 robot with the EV3 Classroom software.
Connect the EV3
In order to download programs, your robot needs to be connected via USB cable or Bluetooth. When your EV3 is connected to your computer, the red dot next to the EV3 brick icon turns green, and all the attached motors and sensors are shown.
The dashboard
When your EV3 is connected you can click the brick icon to open the dashboard. The dashboard provides useful information about:
- EV3 name
- firmware version
- battery level
- motors and sensors
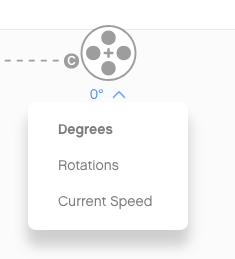
- real-time values
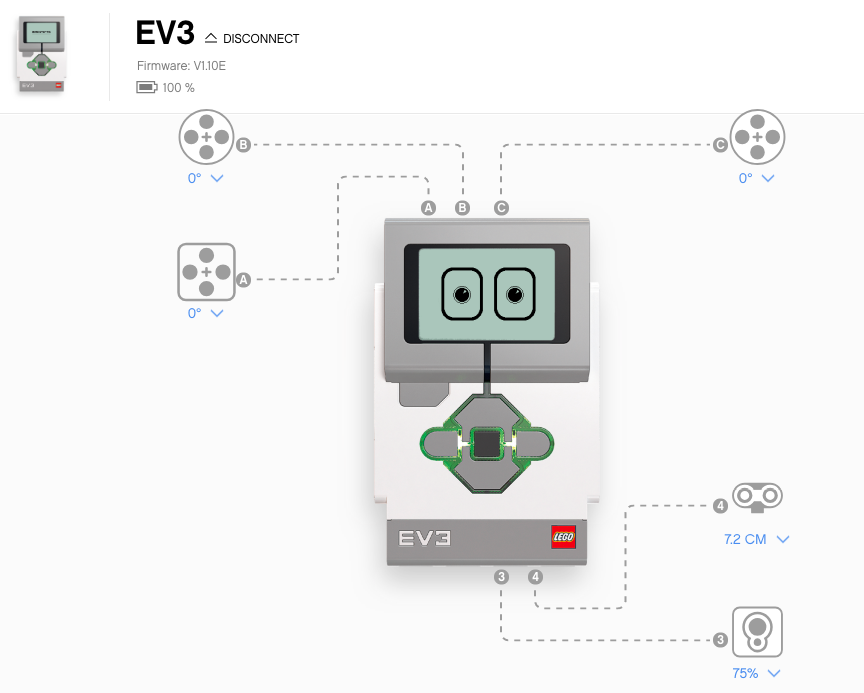
The dashboard displays real-time values of sensors and motors. You can choose which value you want display.
An Update button will appear when new firmware is available.
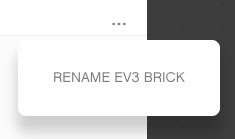
You can rename the brick by clicking on the ... menu.
The programming canvas
The programming canvas is where you will create programs. It consists of:
- block palette
- programming area
- tab bar with open projects
- dashboard overview
- controls to zoom, redo, undo, download, etc.
The block palette
The block palette contains the available blocks grouped by functionality.
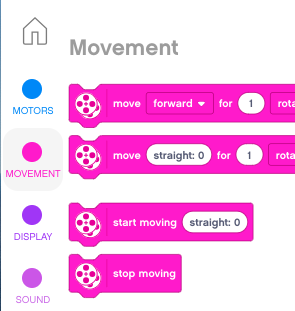
- to use a block, drag it to the canvas.
- to delete a block, drag it back to the palette
To zoom, redo and undo use these 5 buttons

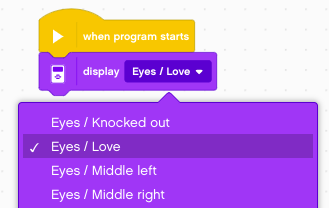
Display eyes
In our first program we are going to display an emotion on the EV3 screen.
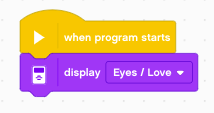
To download and execute the program click on the blue button.

When you download and execute the program, the robot displays this
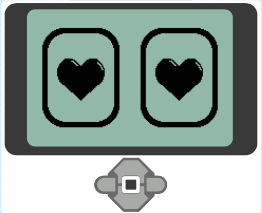
The program continues to display this image until you quit the program with the red stop button.

You can select a different image and try again.
Press a button
Use the center button to change the image on the EV3. When pressing that botton, we show a different image (Eyes/Neutral) but just for 2 seconds. After that we come back to the original image.
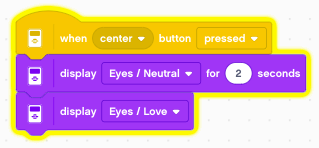
When you download and execute the program you can observe, your program get’s feedback from the EV3. Every time you press the center button, the part of the code activated will have a yellow outline for 2 seconds.
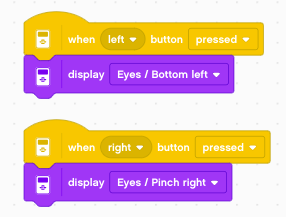
Press left/right
You can add more buttons to your program. For example change the image shown when pressing left/right.
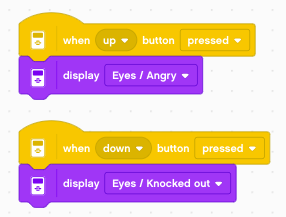
Press up/down
You can add even more buttons to your program. For example change the image shown when pressing up/down.
You can download this file: