Drawing robot
In this chapter we build a drawing robot.
This robot uses three motors:
- the small one to lift the pen
- the large ones to move
To have a higher precision, it uses the small wheels. The pen is place right in the center between the two wheels.
Lift the pen
Try to turn up the small motor lever to the verticl. If the horizontal postion was 0°, it will be -90°.
The angle decreseases as we lift the pen. We can now program the up/down buttons to move the pen. As we want to make this movement as quick as possible, we set the speed to 100%.
For the down movement we set a time. This is necessary, as we let the motor hit a mechanical limit. This trick is a calibration without using a sensor. We move the motor to a known position.
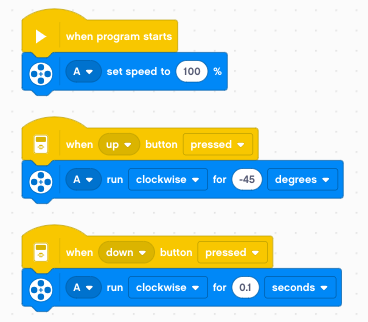
- up: move by 45°
- down: move during 0.1 seconds
Define functions
A program becomes much readable and versatile when using function. Let’s define two functions up and down
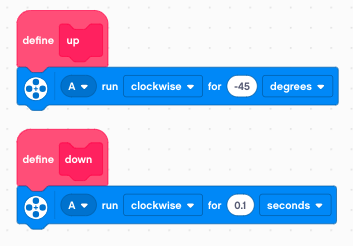
Now we can use this two functions and associate them with the buttons. The code is much more readable.

But there is another advantage. In a large program, we may use the pen in many places. If we change the pen mechanics, or correct a bug with the pen up/down movement, there is one single place to make such a correction
Move the robot
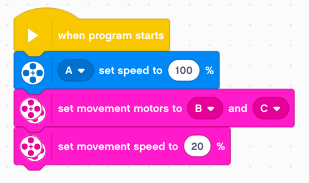
We go no to moving the robot. We are going to use motors B and C for movement. In order to obtain precise drawing results, we set the speed to 20%.
So how much does the robot advance with 1 rotation ? It is difficult to measure from the robot, but it becomes easy if the robot is going to draw a line.
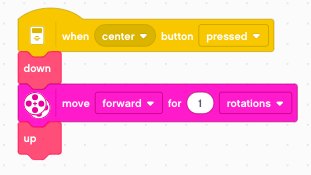
Now you can measure the line. It is about 94 mm long.
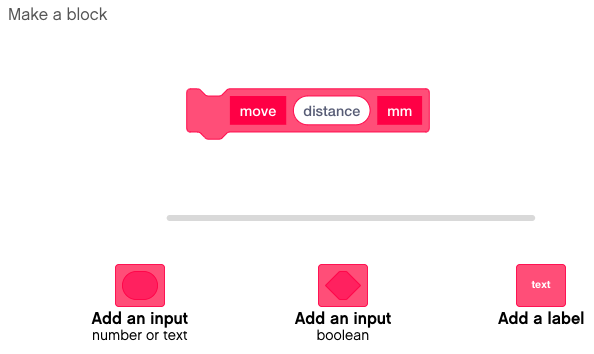
Create a move function
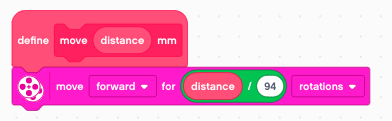
Now we have all the information to create a move function with an argument. So go ahead and create a new function with one parameters and these labels.
With the rule of three we can calculate the number of rotations for any distance. The number of rotations is distance/94.
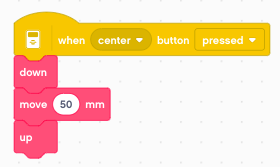
Now we can call this function with a specfic argument. For example 50 mm. Try it and measure the length of the line.
Create a line function
We can go one step further, and directly create a line function.
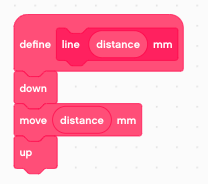
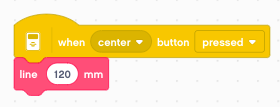
We can now call the line function to draw a line of for example 120 mm.
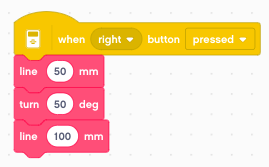
Turn the robot
Now let’s turn the robot on place. First we draw a line 100 mm. Then we pivot by 1 wheel rotation to the left. And finally we draw a second line of 100 mm.
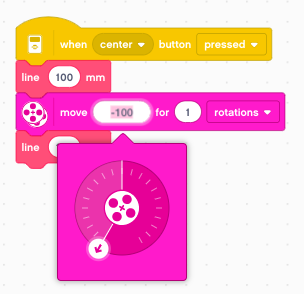
We find that the robot turns by 82 degrees. This allows us to create a turn function.
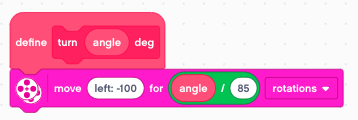
Now we can call this function with a 90° angle.
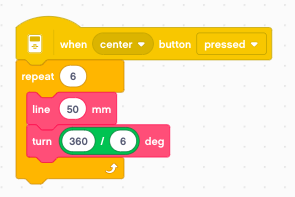
Draw a polygon
We have now everything needed to draw a regular polygon. We just use a loop to repeat n sides of a regular polygon. Then we turn an angle of 360/n degrees. For example we can draw a hexagon with a side length of 50 mm.
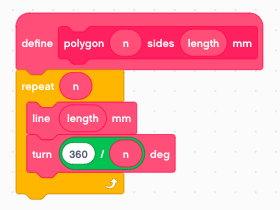
Now we can turn this into a function.
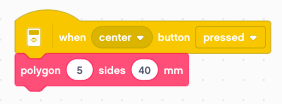
Now we can use the polygon function to draw a pentagon with a side length of 40 mm.
Draw a star
The the star polygon is drawn exactly as the polygon, but the turning angles are multiples of the normal polygon angle. For example, turning 360/5 results in a pentagon. However turning twice that angle, 2x360/5, creates a 5-pointed start.
We create a star function which allows as to draw n/m star polygons.
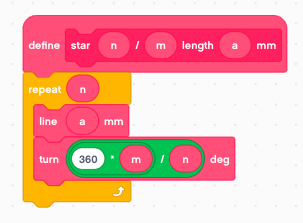
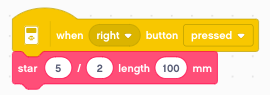
Now lets draw such a 5-pointed star
You can download the programs so far:
draw1.lmsp
Draw a letter
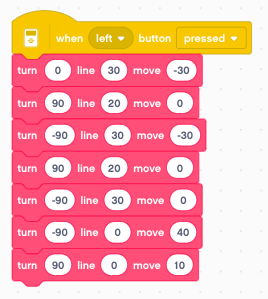
We have everything in place to draw a letter. For exemple to draw the letter E inside a rectangle of 30 x 40 mm we do this:
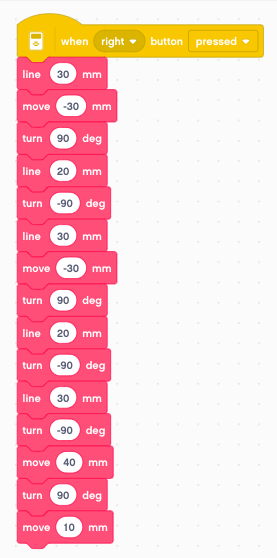
At the end we place the robot to the beginng of the next letter.
A function with 3 arguments
If you look at the previous program, you notice it’s pretty long. But it consists of a sequence of line, move and turn functions. We could combine these three functions in one. Let’s make this function with 3 arguments:
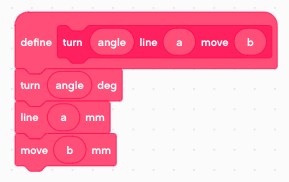
Using this new function, we can reduce the number of function calls from 15 to 7. It is easier to understand, as each line corresponds now to a segment of the letter.
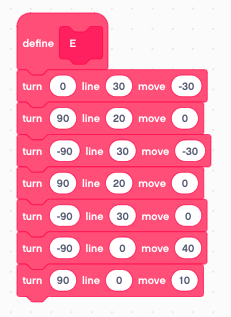
Define letters as functions
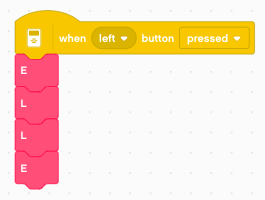
The next step is to define a function for each letter. We define the letter E
We define the letter L

And now we can write the word ELLE